Working with Images
All images you interact with in the MasterPress API are represented by the WOOF_Image class. This class offers a number of methods to access information about your images, and also a wide selection of resizing, cropping, filtering, and processing methods.
The examples presented in this section assume you already know how to access images via the API, please read through Accessing Files and Images if you’re not familiar.
Image Properties
The WOOF_Image class contains methods to access dimension info about your images, and EXIF data (if applicable).
Dimension info
There are a number of methods to access information about the dimensions of your image. First let’s look at the basics: WOOF_Image::width, and WOOF_Image::height:
Example 1: Getting the width and height to manually generate a tag
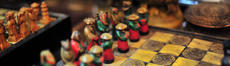
Based on the width and height, WOOF_Image can determine info about the orientation of your image too, which it offers via the methods WOOF_Image::orientation, WOOF_Image::is_landscape, WOOF_Image::is_portrait, and WOOF_Image::is_square. Suppose we load in the chessboard thumbnail from the Twenty Eleven theme, which is a landscape image:
Figure 1: The Chessboard header thumbnail from Twenty Eleven
Then the example will yield the following results (see code comments):
Example 2: Orientation info
EXIF data
Images can contain embedded information describing the photographic properties, and this information is stored using the EXIF standard. To extract EXIF information from your images, you can call on the WOOF_Image::exif image, which returns a WOOF_EXIF object:
Example 3: EXIF data
HTML tag generation
The WOOF_Image class implements the PHP5 magic method __toString to automatically generate an appropriate HTML tag when we echo the object directly. If you want more control over this output, there are a number of methods you can use to generate HTML tags. First let’s take a look at the fundamental method WOOF_Image::tag:
Example 4: HTML tag generation
Note that the tag method will output width and height attributes for this image by default, which can be undesirable when you’re trying to output fluid images for responsive layouts. In this scenario, you don’t generally want the width and height attributes at all, and we have another method to help here: WOOF_Image::fluid which can still accept all other attributes:
Example 5: Fluid images
Image Manipulation, and the image cache
Before we run through the powerful image manipulation methods of the WOOF_Image class, it’s worth discussing what the results of these methods actually are, and how the processed images are cached.
Every image manipulation will store the resulting image in MasterPress’ image cache folder, which is in wp-content/mp/image-cache for single sites, and wp-content/blogs.dir/[blog_id]/mp/image-cache for sites in a multi-site network. This is purely for performance reasons – once the manipulation is performed, which is one of the more costly operations your server can do, we simply serve up pre-processed image from the cache next time the same manipulation is requested.
The returned value of these manipulations is another WOOF_Image object pointing at the cached image. One of the great things about this fact is that we can chain image resize and filter operations together in a single line:
Example 6: Image Manipulation Chaining
A note on this though – every intermediate step will store the cached manipulation, so it’s more efficient to resize first before running an image filter or effect.
Resizing and cropping
The resizing and cropping methods will likely be the most oft-used features of the WOOF_Image class. The fundamental resizing method is WOOF_Image::resize which can resize in just one dimension (width or height), or both width and height, with options to control how images are cropped if necessary.
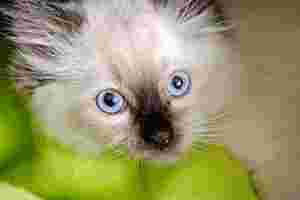
These methods are best illustrated examples. Let’s take our trusty cat image you may have seen throughout the documentation (don’t worry, Maximus has signed a release form to use his likeness). We’ll assume this image is stored in your theme folder inside an images/assets, and is 300 pixels wide by 200 pixels high:
Figure 2: Our original image of Maximus
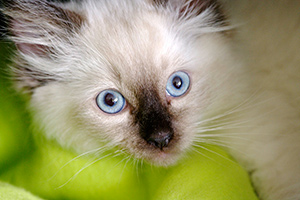
This is a good image to use for demonstration, since the face is central to the picture, and the left, right, bottom and top portions are all quite different.
First, let’s resize just this image by width first, which will proportionally scale the height:
Example 7: Resizing the width only
Figure 3: Resized to 150 pixels wide
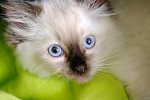
We end up with quite a small image, since the original image is landscape. Now let’s resize it by height only:
Example 8: Resizing the height only
Figure 4: Resized to 150 pixels high
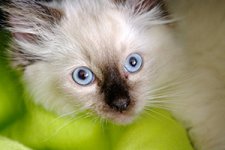
As expected, the image is larger, since the new height here is closer to the original height.
We stated above that when you manipulate an image, the resulting image is placed in an image cache, and a new WOOF_Image is returned based on the cached image. One of the fantastic things about this is that when the tag is generated (here simply by echoing the image) the correct width and height attributes are also output for you, since the new object knows all about the new dimensions of the image, even when you’ve only scaled one dimension. Traditionally, this would have required you to calculate it yourself, or use a low-level function to get this info for the cached image, which was always a point of pain.
Let’s move on, and resize the image in both dimensions:
Example 9: Resizing both width and height
Figure 5: Resized to 150x150
This resize operation will crop the image by default, since we can’t proportionally scale the image this time without cutting some of it out. Note that this is more like a “resized crop” – the image is both resized down to the desired dimensions, and then trimmed where appropriate. This is controlled by the “c” (crop) argument in WOOF_Image::resize which is 1 by default. If you want to truly crop the image without resize, you can either set this property to “2”, or use the more memorable and sensibly named preset method WOOF_Image::crop:
Example 10: Cropping to a width and height
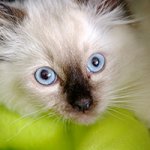
Figure 6: Cropped to 150x150
Controlling the crop anchor
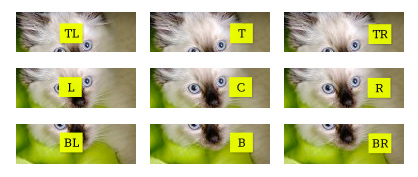
Cropped-resizes and true image crops will crop the image centrally by default, but we can control this behaviour with the “ca” (crop anchor) argument. This is specified as one of “tl” (top-left), “t” (top), “tr” (top-right), “l” (left), “c” (center), “r” (right), “bl” (bottom-right), “b” (bottom), “br” (bottom right) – these can be lower or uppercase.
First we’ll look at the standard cropping case, via WOOF_Image::crop, since it’s a bit easier to explain (we’ve dropped the size down to 120×120 to make the results more distinctive):
Example 11: Cropping to 120x120 with various anchors
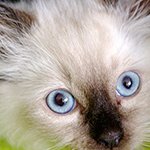
This gives us the results below, which have been superimposed with anchor labels for reference:
Figure 7: Crop anchors with cropped images
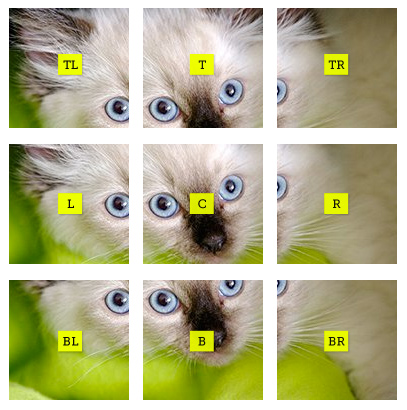
As you can see, the crop anchor will hone the crop in on a specific portion of the image.
The crop anchor is a lot harder to understand, and indeed explain, when using a standard cropped-resize. The best way to describe it is that the crop anchors describe more of a bias toward cropping to the specified anchor, since the image won’t generally need to be cropped in both dimensions. This is most visible when we consider two examples – very wide images and very thin images:
Example 12: Wide and Thin crops
Figure 8: Resizing crop anchors with thin images
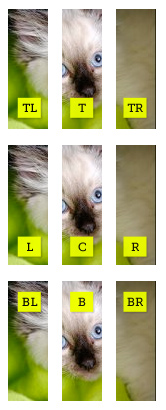
Figure 9: Resizing crop anchors with wide images
Hopefully you can see what we mean by “bias”. The rows of thin images in Figure 8 are identical in the vertical sense, and the columns of wide images are identical in the horizontal sense, since these dimensions don’t need anything cropped out. That is, the crop anchor depends largely on the orientation of the resized image.
Changing the JPEG Quality
The WOOF_Image::resize method also lets you change the output quality if you’re processing a JPEG image, via the “q” (quality) argument, which is an integer percentage in the range 1 to 100. You can obviously combine this with a resize, but it you just want to resample the quality, the alias method WOOF_Image::resample is more intuitive:
Example 13: Resampling the image
Figure 10: "But you said you wanted the site to load quickly!"
Hmmmmmmm, attractive. Maybe the Atari 2600 actually used heavily compressed JPEG images to render sprites? You’d rarely use quality this bad, but we just wanted to show a significant difference so that it was obvious.
Image Filters with GD
The WOOF_Image offers a large number of powerful image filters made possible by the GD library, which is generally enabled in most PHP installations. Again, we’ve aimed to make the names of these methods as memorable as possible, and sugar-coated over some of the more technical concepts like image convolution.
The class reference describes these filters in detail so for the sake of efficiency, we won’t cover them one-by-one. What we will do is show a gallery of these filters applied to (poor) Maximus the cat, with the required call shown below each thumbnail. First though, let’s see an example for running the grayscale method for the first thumbnail – you can extrapolate the rest:
Example 14: The grayscale filter
Figure 11: Image Filters - please use responsibly 🙂
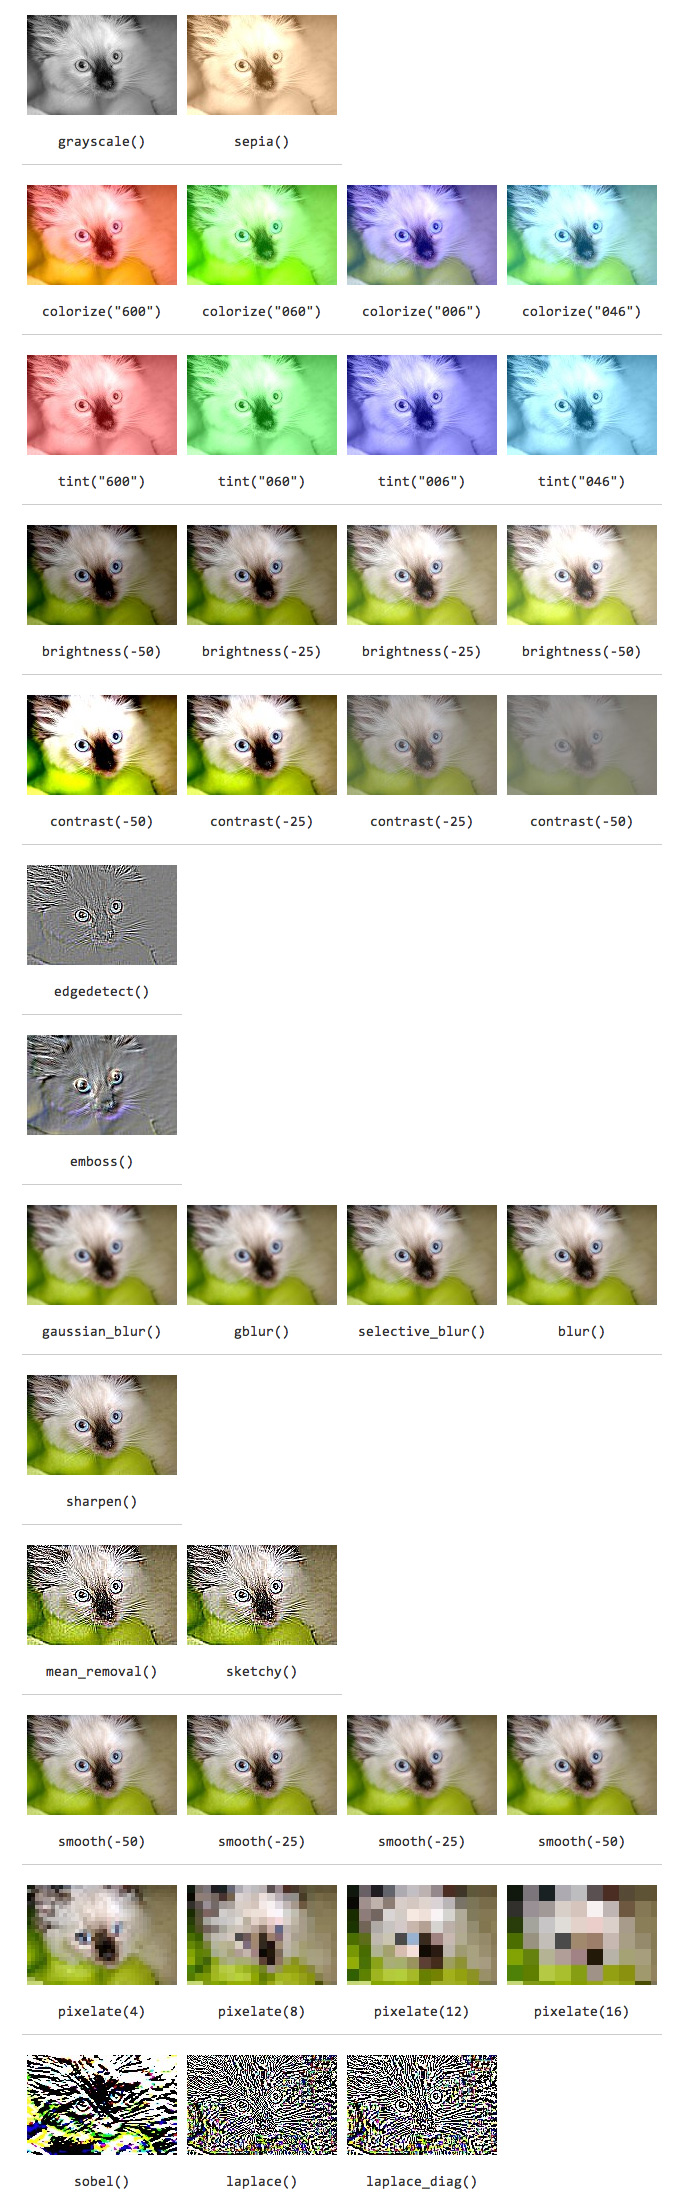
There are a few things to note:
- Some filters are aliases on others, either for brevity or just to use a more meaningful name. For example WOOF_Image::gblur instead of WOOF_Image::gaussian_blur, and WOOF_Image::sketchy instead of WOOF_Image::mean_removal.
- For filters that use colors, we have used the CSS-shorthand-style hexadecimal representation of the color. You can also use the 6-digit style, an array of r,g,b components, or a CSV string of “r,g,b” components.
- Most of these filter use PHP’s imagefilter function to perform their magic, but others use imageconvolution with a preset convolution matrix (such as WOOF_Image::sharpen).
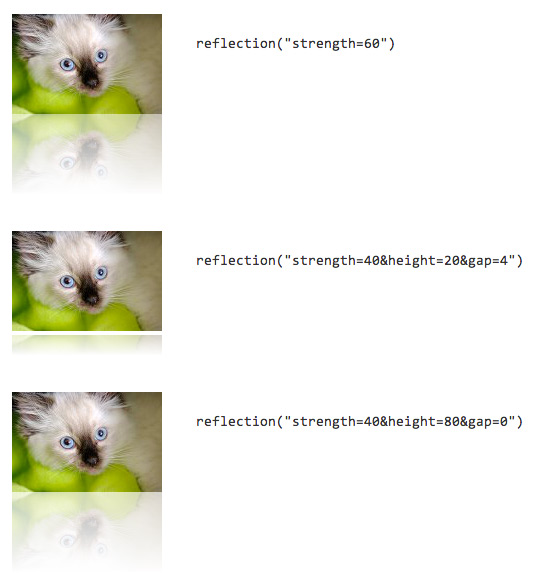
Image Effects
Along with image filters, the WOOF_Image class provides a few extra image effects we can use to gloss up our sites. Again, the class reference describes these effects adequately, so we won’t go into too much detail. First, let’s look at the reflection effect:
Figure 12: Just like your favorite fruit company
Now let’s take a look at the border effect:
Figure 13: Borders, and inset borders (shrinks the image to fit inside original bounds)
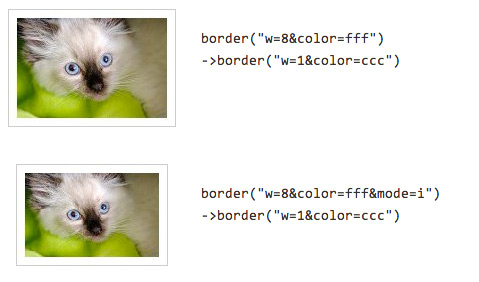
Note in the second example, we’ve set the “mode” argument to “i” which stands for “inset”. This will shrink the original image within the border, so that the overall size of the image remains the same as the original.
Since we can chain our methods, we could use both to build a photo-like representation:
Figure 14: Border AND reflection
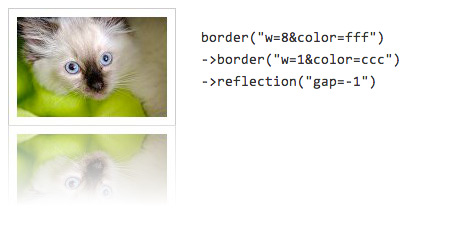
Pretty neat stuff – the only limit is your imagination (or perhaps restraint!).
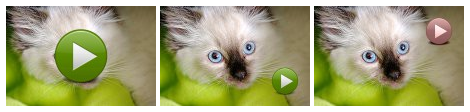
Next, let’s look at the WOOF_Image::watermark method, which allows you easily superimpose one image on another. For this example, we also load in another image containing a “play” icon:
Figure 15: The play icon to be watermarked

Example 15: The watermark effect
Note how the first argument to this method is simply a WOOF_Image, so that we can resize and filter it in any way before watermarking it. Here is the result, which is quite amazing considering it’s just 5 lines of easy-to-understand code:
Figure 16: Watermarked images
That about wraps it up for images – hopefully you can see that having a class to represent images throughout the API offers a lot of power and makes working with them much more developer-friendly.